I noticed something about six months into working from home: standing up from my desk chair had become an event. My hips would protest, my lower back would lock up for a second, and I’d need a moment to unfold myself back into something resembling normal posture.
The deep squat exercise changed that completely. It’s not just another stretch I found on YouTube. This movement literally reverses what sitting does to your body. Where sitting compresses your spine into that familiar C-shape, the deep squat opens everything up and creates space where there was compression.
This position used to be how humans rested before chairs took over. People in many cultures still use it daily. I’ve been testing it for about two years now, and I can tell you it works better than any other single exercise I’ve tried for undoing desk damage.
What You’ll Learn
The deep squat reverses sitting damage by opening compressed hip flexors and decompressing your spine
Keeping your feet flat activates stabilizer muscles that go dormant from desk work and improves ankle mobility
How you rise from the squat matters as much as the squat itself for retraining proper movement patterns
Regular practice can eliminate lower back pain and improve hip flexibility
The exercise works best when held for 30 seconds to 2 minutes, repeated throughout your workday
There are modifications that make this accessible no matter your current flexibility level
What Sitting Actually Does to Your Body
Before I explain why the deep squat exercise works so well, you need to understand the mechanical damage that sitting creates. I spent a lot of time reading research on this after my back injury in 2012, and the changes are more systematic than most people realize.
Your hip flexors—the muscles connecting your thighs to your lower back—get chronically shortened and tight from sitting. These tight muscles pull your pelvis forward and down, which creates an exaggerated arch in your lower back that compresses your spinal discs. Meanwhile, your glutes essentially shut off and become weak, so they can’t support proper posture anymore.
Your thoracic spine rounds forward as you lean toward your screen. Your neck cranes forward to keep your eyes on the monitor. This creates a cascade of tension that travels from your neck all the way down to your tailbone. Your ankles lose mobility, your calves tighten, and your entire posterior chain becomes overstretched and weak.
The result is a body that’s literally molded by your chair. Your front side gets short and tight, your back side gets long and weak. This is why standing up after hours of sitting feels so difficult—your body has adapted to the seated position and fights against returning to normal alignment.
Why the Deep Squat Is the Perfect Counter-Movement
The deep squat exercise serves as the perfect opposite to sitting because it reverses every single harmful adaptation that chairs create. Where sitting compresses, the squat decompresses. Where sitting shortens, the squat lengthens. Where sitting weakens, the squat strengthens.
Hip Flexor Relief
In the deep squat position, your hip flexors get stretched to their full length while your glutes activate in a lengthened position. This combination breaks the sitting pattern where hip flexors are short and tight while glutes are long and weak. I noticed immediate relief from that tight, pulling sensation in my hips and lower back the first time I held this position for more than 30 seconds.
The flat-footed stance is critical here because it prevents you from cheating the position by rising onto your toes. When your feet are flat, your body has to find mobility through your ankles, calves, and hips—exactly the areas that sitting restricts most.
Spinal Decompression
Sitting loads your spinal discs with compression forces. The deep squat exercise creates gentle traction through your entire spine. Your vertebrae separate slightly, which allows disc material to redistribute and relieves pressure on compressed nerves.
The squat position also encourages a natural lumbar curve, which is the opposite of the rounded spine that sitting promotes. This curve distributes weight evenly across your vertebrae instead of concentrating stress on the front edges of your discs.
Getting the Form Right
Proper form in the deep squat exercise is essential for maximum benefit and injury prevention. I see a lot of people attempt this position incorrectly, which can actually reinforce poor movement patterns instead of correcting them.
Setting Up
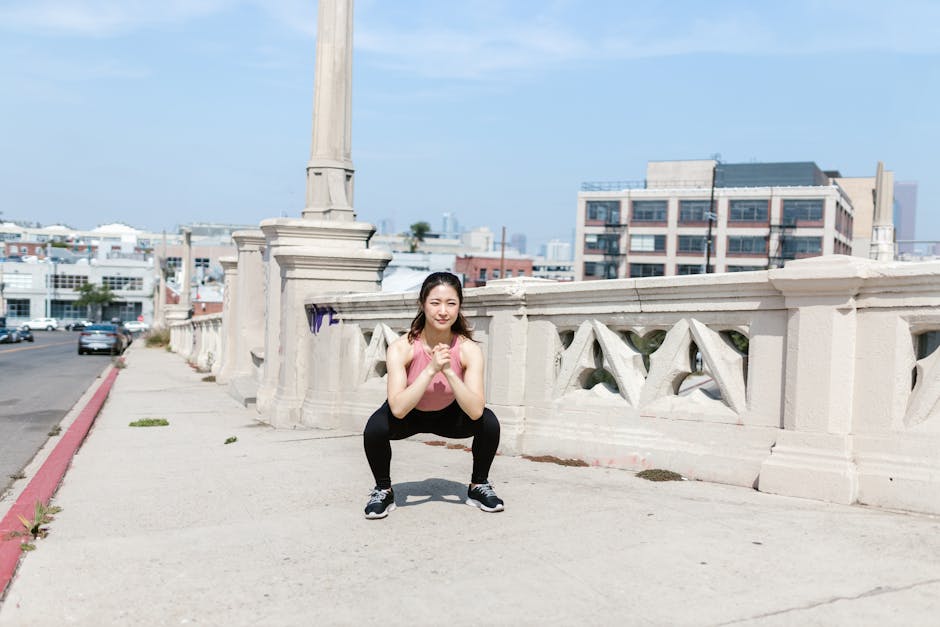
Start with your feet slightly wider than shoulder-width apart, toes pointed slightly outward. This stance provides the most stable base and allows for optimal hip mobility. Your feet must remain completely flat throughout the entire movement. I can’t stress this enough—it’s non-negotiable for proper form.
Keep your chest up and shoulders back as you begin the descent. Many people make the mistake of rounding forward as they squat down, which recreates the same spinal position that causes problems in sitting. Instead, maintain an upright torso with a slight natural arch in your lower back.
The Descent
Lower yourself slowly by pushing your hips back and down, as if you’re sitting back into an invisible chair that’s much lower than normal. Your knees should track over your toes, never collapsing inward. The movement should feel controlled and deliberate, not like you’re falling into position.
As you descend, focus on keeping your weight distributed evenly across your entire foot—heel, arch, and toes all maintaining contact with the ground. This flat-footed position forces your body to find mobility in all the right places while building strength in your stabilizing muscles.
The Critical Rising Technique
How you rise from the deep squat exercise is just as important as the squat itself. This is where you can either reinforce healthy movement patterns or accidentally perpetuate the same dysfunction that sitting creates.
Start with your hips: Before your knees move, push your hips back slightly and stick your butt out. This engages your glutes and hamstrings—the exact muscles that sitting weakens.
Keep your back curve: Maintain that natural arch in your lower back as you rise. Don’t let your spine round forward, which would recreate the sitting posture pattern.
Drive through your heels: Press firmly through your heels while keeping your entire foot planted. This activates your posterior chain and prevents forward weight shifting.
Keep your chest up: Maintain an upright chest throughout the entire rising motion. Your head should stay in a neutral position, not jutting forward.
Stand completely upright: Finish the movement by fully extending your hips and standing completely upright with your shoulders back.
This rising pattern teaches your body the correct way to move from a low position, which directly transfers to better mechanics when getting up from your desk chair. Instead of using momentum and poor posture to stand up, you’ll develop the strength and coordination to rise with proper alignment.
Modifications for Different Flexibility Levels
Not everyone can immediately perform a perfect deep squat exercise, especially if you’ve been sitting for years and have significant mobility restrictions. I definitely couldn’t when I started. The key is to begin where you are and gradually work toward the full position.
Beginner Modifications
If you can’t achieve a full deep squat while keeping your heels down, start by holding onto a sturdy surface like a desk or doorframe. This support allows you to practice the position without losing balance or compromising form. Gradually reduce your reliance on the support as your mobility improves.
Another helpful modification is placing a small pillow or cushion under your heels to reduce the ankle mobility requirement. As your flexibility increases, use progressively thinner props until you can perform the movement on flat ground.
Advanced Progressions
Once you’ve mastered the basic deep squat exercise, you can increase the challenge by extending your hold times. Start with 30-second holds and gradually work up to 2 minutes or longer. You can also add gentle movements within the squat position, such as small weight shifts from side to side or gentle spinal rotations.
For the ultimate progression, practice transitioning smoothly between sitting and squatting throughout your day. Use the squat position as an alternative to sitting when possible—while watching TV, taking phone calls, or during short breaks at work.
When and How Often to Do This
The beauty of the deep squat exercise is its versatility and accessibility. You can perform this movement anywhere, anytime, in whatever clothes you’re wearing. I do it in jeans, dress pants, whatever I happen to be wearing.
For maximum benefit in reversing sitting damage, I recommend performing the deep squat exercise every 30-60 minutes throughout your workday. Even a 30-second hold can provide significant relief and help reset your posture. These frequent mini-sessions are far more effective than trying to undo eight hours of sitting damage with one long session at the end of the day.
Morning sessions are particularly valuable because they prepare your body for the day ahead by opening the areas that sitting will compress. Evening sessions help decompress and realign your body after a full day of desk work, which I’ve found promotes better sleep and recovery.
Pay attention to your body’s signals throughout the day. Whenever you feel hip tightness, lower back compression, or general stiffness from sitting, use the deep squat exercise as an immediate remedy. Your body will quickly learn to crave this position as relief from the constraints of your chair.
Common Mistakes That Kill the Benefits
Even with good intentions, many people sabotage the benefits of the deep squat exercise through common form errors. I made some of these mistakes myself when I first started, and being aware of them can help you maximize the corrective effects of this movement.
Rising onto your toes is the most frequent error, usually caused by tight calves or limited ankle mobility. This compensation pattern defeats the purpose of the exercise because it allows you to avoid addressing the very restrictions that sitting creates. Always prioritize keeping your heels down, even if it means you can’t squat as deeply initially.
Allowing your knees to collapse inward is another common problem that can actually create new issues instead of solving existing ones. This typically happens when people try to force the position before they have adequate hip mobility. Focus on keeping your knees aligned over your toes throughout the entire movement.
Rushing through the rising motion negates much of the exercise’s corrective value. The way you come up from the squat is just as important as the squat itself for retraining proper movement patterns. Take your time and focus on perfect form rather than speed.
My Experience with This Movement
I started incorporating the deep squat exercise into my daily routine about two years ago when my lower back pain was getting worse from long coding sessions. The flat-footed position was challenging at first—my ankles were tight and my hip flexors were so shortened that I could barely get into position without holding onto something.
Within about three weeks of doing this movement every hour or so during my workday, I noticed that standing up from my chair didn’t require that same painful unfolding process. The tight pulling sensation in my hips started disappearing. After about two months, I could hold the position for over a minute without support.
The rising technique with the butt-out, back-curved pattern has been particularly valuable. It’s retrained my body to use my glutes and hamstrings when standing up from low positions, which has transferred to better mechanics when getting up from my desk chair throughout the day.
I now use this movement as my go-to reset whenever I feel that familiar tightness building up from sitting. Sometimes I’ll drop into a squat right next to my desk, hold it for 30-60 seconds, and immediately feel the relief as my body returns to something closer to its natural alignment.
Watch: How to Deep Squat with Proper Form
https://www.youtube.com/watch?v=Ufzcm6BWJN4
Video courtesy of Squat University
Frequently Asked Questions
What is the deep squat exercise for back pain?
The flat-footed catcher squat — squatting all the way down with feet flat. It decompresses the spine and reverses the effects of prolonged sitting.
How long should you hold a deep squat?
Start at 30 seconds and work up to 2-5 minutes daily. Consistency matters more than duration.
Is the deep squat safe for everyone?
Most people can work toward it, but those with knee or hip problems should consult a doctor first. Start gradually and use support if needed.
Products Mentioned in This Article
As an Amazon Associate, I earn from qualifying purchases. These links help support the site at no extra cost to you.
{“@context”:”https://schema.org”,”@type”:”FAQPage”,”mainEntity”:[{“@type”:”Question”,”name”:”What is the deep squat exercise for back pain?”,”acceptedAnswer”:{“@type”:”Answer”,”text”:”The flat-footed catcher squat — squatting all the way down with feet flat. It decompresses the spine and reverses the effects of prolonged sitting.”}},{“@type”:”Question”,”name”:”How long should you hold a deep squat?”,”acceptedAnswer”:{“@type”:”Answer”,”text”:”Start at 30 seconds and work up to 2-5 minutes daily. Consistency matters more than duration.”}},{“@type”:”Question”,”name”:”Is the deep squat safe for everyone?”,”acceptedAnswer”:{“@type”:”Answer”,”text”:”Most people can work toward it, but those with knee or hip problems should consult a doctor first. Start gradually and use support if needed.”}}]}